First Year Summary and T@G Modification

Year one of camping is under our belts! We bought a new T@G MAX XL and it was pretty much good to go. However, we have made a few modifications.

First Year in our T@G

We purchased our teardrop, a T@G MAX XL, in September 2016.  So, it has been a year now since we became teardroppers. Being new to camping in general and never previously having owned any type of camper.  We learned a lot in this first year and have implemented T@G modification.   Additionally, in the past year, our camper has been towed 3,430 miles on eight camping trips to five different states (AL, GA, FL, TN, & AR).

There were not any exceptionally long trips this first year for two reasons:  1) we had to figure out what we were doing and 2) we are actively working toward a knee replacement for my husband and it precludes long trips planned well in advance.  Our longest trip lasted a week.  We expect much longer trips next year.

Our T@G is really well-designed and is comfortable and functional, despite its size, but we did make a few minor changes.

1) Removal of the Headboard:  

We had our dealer remove the headboard at the time of purchase.  My husband is 6’3″ and he really needs the extra space.  The headboard was nice, but comfort trumped utility in this instance.  He is able to sleep very comfortably with this T@G modification.

T@G without headboard

2)   DVD Light-Blocking Panel

My big guy cannot stand any light while sleeping and the light on the DVD player is quite bright.  One of the first things he did was to make a panel to block the light.  It attaches with Velcro and works very well. This T@G modification may appeal to those sensitive to light while trying to sleep.

Light-blocking panel

3)  Head Protection, Cabin and Galley

My husband’s height has caused some pain on a couple of occasions because the open shelving over the head of the bed had some hard edges.  Bumping his head motivated him to look for a solution.  He installed foam padding attached with glue strips.   There have been no injuries since this was done.

Padding on the Shelf

He also shortened the length of the hex studs on the galley door.  They were longer than necessary and he had scraped his head on them before the mod.

Modified studs

4) Greywater Drain Access

Having to crawl around on the ground to attach the hose to drain water from the sink was not one of my favorite things.   A lady on one of the teardrop Facebook groups posted that she has a solution to provide easy access and I immediately requested the modification for our camper.  Her solution was lower to the ground.  We raised ours upon the recommendation of a plumber so it would be less likely to get caught on a curb or on uneven terrain.

Greywater Drain Access

5) License Plate Holder

The original way the holder was mounted was flimsy and hung low to the ground.  One of the first things we did was to purchase a black plastic tag holder and mount it appropriately 1 1/2″ higher to the lower frame using the existing screws.

6) Naming the teardrop 

We had no idea how camping would be for us and did not have a name for the trailer initially.  After a little experience, we named it Endeavor and had the name installed on the back.  There is an older post that describes the naming process and installation.

7) Inexpensive and easy air antenna

We purchased an air antenna at the time we got our camper and tried to use it several times.  It did not do a great job, but we were often not in high reception areas.  I saw a post on a Facebook teardrop group a where a gentleman was using a co-axel cable about 6″long to attach to the cable receptacle with the outer insulation stripped off by about 2.5″.  It worked fairly well the one time we tried it and is more compact than the one we purchased.  I am not sure how useful it will be as reception is not usually strong at campsites, but I like its simplicity.

Inexpensive TV Antenna

8) Memory Foam Cover

As many campers have suggested, we installed a memory foam cover over the mattresses  Ours is a 2″ cover and we also use a mattress pad for comfort and an added layer of separation from the memory foam itself for allergy reasons.  It has made our bed quite comfortable.  I don’t think the mattresses alone would have been adequate.

T@G Modification Reversal

We had a diffuser over the air conditioner because the constant blowing of air directly on us was annoying.  It was a plastic traylike apparatus that was rather flimsy and stuck out quite a bit.  However, we seemed to have more issues with condensation using it and it was an obstacle to be avoided. I managed to knock it down and break it the second trip it was used and we decided to not replace it.

Under Consideration

My tall husband has to stoop when under the galley.  We checked with our dealer about the possibility of adding the Outback wheels to raise the overall height.  This would get us electric brakes as well.   It is a little pricey, but the bigger issue was a concern about the width and getting it into our garage.  We still may do this at a later date.

Summary

In conclusion, our first year in Endeavor was wonderful and we have not make a lot of  changes.  We are happy with our T@G modification.  Looking forward to year two!

Retired couple


Packing for Camping-Our Process

The smaller the camper, the more important it is to be organized and have needed items in a place that is predictable and easily accessible. We have now been on several camping trips and have a process that works for us.

Packing for Camping

Approximately once a month, we take a camping trip.  To simplify our packing for camping, we try to keep as much equipment as we can packed in some manner so it is always ready to go.  For example:

  • Under the Bed-Extension cords, co-axiel cable, television antenna, awning, a few long tools that will not fit in our toolbox, charcoal, umbrella, 30/50 amp converter, nylon cord, and extra flashlight are kept under the bed in the camper and are always ready to go.
  • Inside the Cabin-Hanging shoe bags are attached to the wall on each side of the bed.  A laundry bag and manuals are in a cabinet.  A flashlight for getting up in the middle of the night is in the space between the bed and wall.  These items are always there and ready to go.
  • In the Galley-The galley always has some basic items:  dish cloths and towels, salt and pepper, basic spices, olive oil, a small coffee pot, toaster, small garbage can and trash liners, small flashlight, lighter, wet wipes, Saran Wrap, aluminum foil, bug spray, dish drainer mat, scrubber,  tire gauge, wet wipes and hand sanitizer.  We also keep our 30/15 converter on a shelf in the galley because we always hook our camper up to our home power before trips.
  • In a Footlocker- All the dishes that we might use for cooking are stored in a large plastic footlocker. This includes plates, utensils, glasses, bowls, skillet, pan, etc.  The only extra we sometimes bring is a crockpot or small grill, but that is only if there is a specific plan to use it.

Galley Storage

T@G Galley
Overall View of Galley
Galley Shelf
Under the Sink

When leaving for a trip, we use the galley area to store items needed to hook up.  We put the electrical cord and water hoses there, plus the hand tool for the camper stabilizers.   We also strap gallon containers of water to the cabinet and store a foam rubber that rug we always use behind the galley.  Those items are readily available when we arrive at our campsite.

Cords and hoses transported in galley

Cabin Storage

We always transport the footlocker, rectangular table, small blower bucket,  and small folding table in the cabin of the camper.

Packing for Camping T@G cabin
Items Transported in Cabin

Tow Vehicle Storage

We use the back of our SUV to store food, chairs, a rug and whatever optional equipment we are taking.  We have a 10×10 screen room, EZ tent, porta potty, and privacy tent.  If the trip is more geared to sightseeing or we are at a site for less than 2-3 days, we do not set up a tent or screen room.  If we are very near a restroom, we leave the porta potty at home.

With most camping items pre-packed,  I spend most of my trip preparation on determining what food to bring and what clothes to pack.  We store food that does not require refrigeration in three covered bins. One bin is always prepacked with dishwashing liquid, a small bottle of laundry detergent, tablecloths/clips, and coffee filters and the other two have specific food for the trip.  There is also a bin for tools–my husband likes to be prepared.

We each pack a small suitcase and take a pre-packed bath bag with toiletries.  We have found that it works better to use the backseat of our SUV for personal items.  They are always in the same spot, therefore, it is easier to locate needed items.   My husband’s items are on one side of the backseat and mine the other.  We each use the floorboard for extra shoes, hats, etc.  Also, we generally transport a small ice chest in the middle and a couple of lanterns in the floorboard.

Packing for camping SUV backseat
Back Seat of SUV

Length of Trip

Our longest trip so far has been a week.  We have discussed much longer trips and the plan for those is not very different from our packing for camping today.  For those longer trips, we would just do laundry and buy groceries while traveling.   I can’t wait to try out this theory!  (This link is to a post for planning our first long trip)

Packing for camping takes effort, but for me,  prepacking and organization makes it easier.  I am sure that most seasoned campers have methods that work for them and may be quite different from what I have described, but this is what works for us.

HAPPY PACKING!


Tongue Weight–A Cautionary Tale

Our T@G is very lightweight and we pull it with mid-sized SUV, so we did not anticipate any towing issues. Our solution for hauling bikes created an issue related to tongue weight. Our earlier post, Bikes and Teardrop Camping–Our Solution, has been modified to include this new information. While what we originally had did not work, changing to a different receiver has been confirmed by E-Trailer to do the job!

We have hauled bikes with our teardrop by using a dual receiver.  It enabled us to put a bike rack on the back of our SUV.  However, we did not fully understand the impact on the tongue weight of our vehicle.

Bikes Towed with our Teardrop

Our Initial Understanding

When we ordered the bike rack, a customer service rep at E-Trailer explained that our dual hitch was splitting the towing capacity of the dual hitch into two amounts, each component one half of the capacity of the hitch.

Our dual hitch has a capacity of 400 lbs, so each component would have a capacity of 200 lbs.  Our trailer’s tongue weight is 160 lbs with LP and battery (less than 200 lbs) and our bike rack plus bikes weighed 100 lbs (again less than 200 lbs).

We also considered the capacity of our towing vehicle, which is 350 lbs.  One half of 350 is 175 lbs and as this is under the weight of our trailer for one component and the bikes for the other, we thought we were okay.

What we did not initially understand is that by using a dual hitch, the overall capacity of our towing vehicle was reduced.  My husband ordered the hitch on-line and was not aware of the impact of the hitch on tongue weight.   This left our towing vehicle with a capacity of 175 lbs and the tongue weight of our towing was 240 lbs.

Fortunately, we received feedback from members of camping groups on Facebook who are more knowledgeable than we and they alerted us to this problem.  However, because of the multiple things to consider, we were quite confused.

Dual Hitch Considerations

As I understand it now, if using a dual hitch, you have to compare the tongue weight of what you are hauling against two separate limitations.

1) The tongue weight capacity of the tow vehicle, reduced by 50% because the dual hitch is used.  In our case, this was 175 lbs.  Our total tongue weight was 240 lbs, and we had a real problem here.

2) The tongue weight of the dual hitch.  Our hitch has a tongue weight capacity of 400 lbs, with 200 lbs for each half.  At 160 for the trailer and 100 for the bikes, we did not have an issue with the hitch.

Because our SUV has a lower tongue weight capacity, it is the capacity that  must be used when determining our hauling weight.

Our Results

We hauled our bikes on two camping trips that were relatively close to home.  The car handled well and there did not appear to be problems with the towing.  However, we had difficulty getting the leveling wheel off and on.   Also, the back tires on our SUV developed cupping. We had to replace our tires on the back sooner than we needed to replace the front tires.  We do not know that the excess tongue weight caused the tire issue.  However, we think it is the likely reason.

Now the good news!  I was communicating earlier with James Phipps, who is in a couple of teardrop groups on Facebook.  James and I communicated quite extensively about his concerns and he posed a question to E-Trailer to confirm his theory.  They confirmed that he was correct regarding the tongue weight issue but also offered two solutions that should be viable.  The response E-Trailer sent to James is below.

We could haul our bikes in much the same manner as we have in the past without exceeding tongue weight capacity.  We should just use a multipurpose ball mount instead of the dual hitch extender.

I would never have guessed that such a simple change could make such a difference.  If we were to use option 1 below, we would have a tongue weight of approximately 260 lbs and a capacity of our original 350 lbs. It would be well within our capacity.  Thank  you James for this information!

Options for hauling bikes


Bikes and Teardrop Camping–Our Solution

We implemented this process for towing our bikes with our camper, but have since learned that we were exceeding the tongue weight limits of our tow vehicle because of the dual hitch. This could work for those whose tow vehicle has a high tongue weight capacity, but does not work for us. See my follow-up post, Tongue Weight–A Cautionary Tale. A change to a different receiver will eliminate the tongue weight issue.

Soon after we began camping, we saw how nice it would be to have bikes with us on our trips.  We camp with friends who have much larger equipment and they routinely carry bikes, but it seemed a stretch for us.  We rented bikes on a couple of occasions.  I accepted that option, but my husband searched for a solution.

He considered mounting them on the back of the camper, but we read that it is not a good idea to put a bike on the back.  We never saw any great options for an installation on top.  He had an idea of a dual receiver and was considering having a machinist make one but found a dual hitch on-line.  Below is the hitch that we used.  We have since learned that it reduces the overall tongue weight capacity of our vehicle by 50% and another hitch should be used.  See E-Trailer response below.

Our receiver caused a tongue weight issue, but according to E-Trailer, a change to a different receiver will enable us to carry our bikes.  We would choose Option 1.

Consider tongue weight limitations before implementing any additional towing options.  See my post Tongue Weight–A Cautionary Tale for additional information.

Options for hauling bikes
We exceeded our tongue weight capacity with this receiver

Bike Rack

Next, we needed a bike rack that would work with both the camper and the hitch.  We discussed it in depth with a Customer Service Rep at E-Trailer and she helped us select a rack to carry our two bikes.

We purchased a Thule Vertex 2, 1 1/4-2 model bike rack.  Our bikes weigh about 30 pounds and the rack weighs 70 pounds.   The rack does a good job of carrying our bikes, but it does add extra steps in our hitching and unhitching process.

Rack for bikes
Bike Rack in Open Position

When we first set it up, the bikes moved around too much, which made me quite nervous.  However, they secure very well with two short bungee cords (purchased separately) and the adjustable strap that came with the bike rack.

Rack for bikes
Bike Rack and Securing Accessories

We had to add extenders to our safety chains because the dual hitch is longer than the standard.  The chain extenders and 3/8″ threaded connectors were purchased at Lowes.  We only use the dual hitch and extended chains if we are hauling our bikes.

Our Steps to Tow Bikes With Teardrop

  • Insert hitch into tow vehicle receiver using locking pins (one to tow vehicle and other to bike rack).
  • Attach camper to bottom receiver using appropriate-sized ball (not included with receiver).
  • Bike rack should be attached to the top of receiver and locking pin inserted (not included with receiver).
  • Attach largest bike to rack first and stabilize front and back wheel using a short bungee cord.
  • Attach second bike to bike rack and stabilize front and back wheel using second short bungee cord.  You may have to move the pedals a bit so they can fit snugly.
  • Wrap adjustable strap around both bikes and tighten the straps snugly while pulling bike frames toward the tow vehicle.
  • Hitching or unhitching with the bike rack adds approximately ten minutes to the process.

You then reverse the process to unhitch.  We have taken our bikes on a couple camping trips and was not aware of issues with this method of transport.  We later learned about our tongue weight issue, but a change to a different receiver should solve the problem.

There are, no doubt, other ways to haul bikes with teardrops, but this has worked very well for us.  We hope it helps others who are interested in taking their bikes on camping trips.

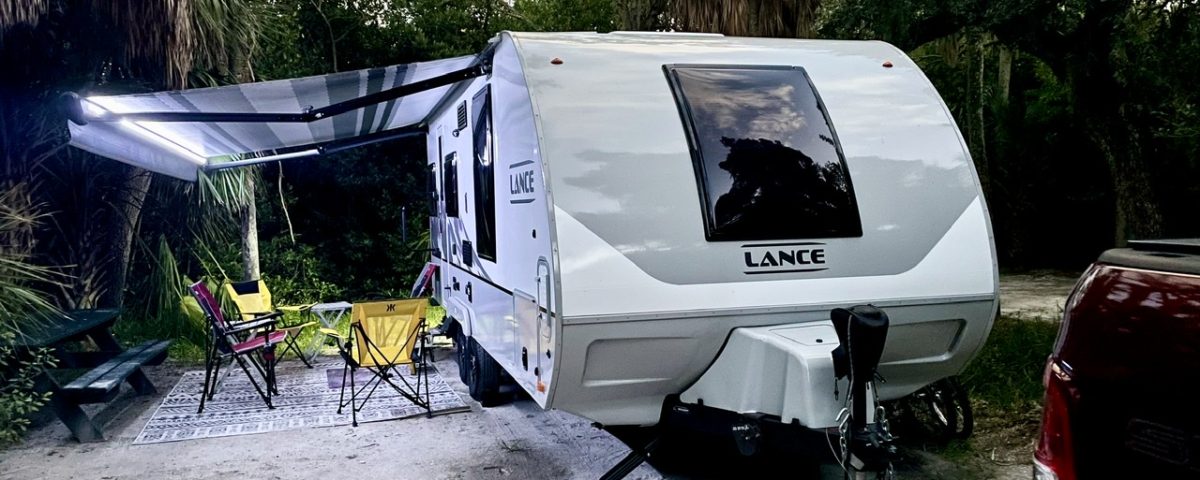
UPDATE November 2022:  We are now camping in a 25’ Lance travel trailer and are hauling heavy ebikes.  This post describes our current solution Hauling Bikes Camping With Lance 2075.

Happy Camping!


Naming the Teardrop

With a few camping trips under our belt and an idea of how camping will be for us, we were ready to name our teardrop. The approach was the same as I used for naming my children, start with a group you like and negotiate to something that works for both parties. We started with a dozen or so synonyms for “adventure” because it is what we are seeking.

What’s in a Name?

Naming our teardrop was a must for us.  We especially liked three or four names, but settled on “Endeavor.”   It seemed to fit our journey.   Webster’s meaning for the word is “to strive to achieve or reach.”  From the Thesaurus, “an effort to do or accomplish something.”  Related words are striving, struggle, throes, undertaking, trial and error.

The name certainly describes the challenge and effort that goes with teardrop camping, at least for us being new campers at our age.  It’s not like sitting comfortably in a spacious motorhome.   Ours is a much more hands-on, outside with nature form of RV camping.  It requires us to work together and compromise far more than we must do when at home.  It has gotten easier over time, but as we travel to more far away places and on longer trips, we will still need to endeavor.

My husband also liked the name because it sounds like a Trekkie name for a starship.  When you think of how our little cabin is our means to visit so many far away places, it fits.

A friend of ours owns  Stripe King, a local company that does graphics for police and fire vehicles, RVs, and boats.   We purchased our graphic from him and really like how it turned out.

You may have noticed that we do not have the @ in our teardrop’s name like you see on most T@Gs.  I wanted it, but my husband wanted just the regular letters.  As he has compromised so much for me, I had to let him have that one.

We are looking forward to a trip to camping with Endeavor.

Happy camping!

Naming Update

After 2 1/2 fabulous years in our T@G, we sold it and purchased a nüCamp T@B 400.  Our reasons are outlined in my post, Replacing Our Tiny Camper, A Big Step .

In memory and because the name really fits our particular brand of camping, we named our new camper Ende@vor II.  We love this camper just like we loved the T@G.

We obtained the lettering for the 400 at DIY Lettering  and we were happy with the results.

Naming our T@B 400
Endeavor II

If you would like to see other information regarding what we have learned about camping, check out our Camping Resources for New Teardrop Campers.

Camping Checklist, Don’t Forget Your Important Items

As new campers, we have found a checklist to be vital. We also use a checklist for food on each trip. This is our camping checklist.

Our camping checklist was very critical to the success of our camping trips when we first began.  However, we did not use it as much later because many of the items are stored in the camper and footlocker.

Currently, we have a much smaller list of the optional items we are taking and the items that must be added to the cabin for transport.

Camping Checklist:

  • Tent/shelter with poles and stakes
  • Binder clips if attaching tent to Trailer
  • Ground cover/rug
  • Fuel for stove
  • Lighter
  • Chairs
  • Table
  • Water hoses (2)
  • Power cable with adapter
  • Privacy tent
  • Porta-potty/tissue
  • Co-axial cable
  • Leveling blocks
  • Hitch locks
  • Flashlights
  • Extension cord
  • Duct tape
  • Heater (if cold)
  • Electric blanket (if cold)
  • Bucket if no sewer for dishwashing
  • Box of assorted tools
  • Outdoor fan (if hot)
  • Awning

Cooking Gear

Most of the following is in a large footlocker that is always packed.

  • Frying pan
  • Cooking pot
  • Plates, bowls, cups, glasses, cutlery
  • Paring knife, spatula, cooking spoon
  • Coffee maker
  • Toaster
  • Corkscrew
  • Tablecloths (2)
  • Salt/pepper/spices
  • Plastic storage bags for leftovers
  • Foil
  • Paper towels
  • Cooking spray
  • Sponge, dishcloth, scrubber
  • Dishwashing liquid
  • Cooler
  • Water for drinking and cooking
  • Trash bags
  • Food

Clothing

  • Daytime clothing
  • Sleepwear
  • Rainwear, if applicable
  • Extra layers for warmth
  • Swimwear, if applicable
  • Shoes: hiking,  flip!flops
  • Hat
  • Sunglasses

Personal Items

  • Sunscreen
  • Towels & washcloths
  • Soap
  • Insect repellent
  • First Aid kit
  • Medications
  • Toothbrush & toiletries in shower bag for each person
  • Hair dryer/flat iron
  • Makeup
  • Bikes, locks & helmets
  • Laundry bag
  • Laundry detergent

Other Items

  • Camera
  • Campsite reservation
  • Games
  • Tablet
  • Electronics chargers

We hope this list is helpful to you new campers because camping is more fun when you have brought what you need.  If you would like to view more of things we have learned, we have a camping resource page you might want to access.  The page will be updated as we have more information to share.

Wishing you safe and happy travels!